post

What You Need to Know About Roof Repair

Roof Repair NJ is a great way to restore your home’s structural integrity without tearing down and replacing the entire roof. Generally, roofing repairs are focused on repairing leaks and damaged materials.Roof Repair

Checking for water stains on the ceiling is an excellent place to start. Also, look for deteriorating fascia and soffits.

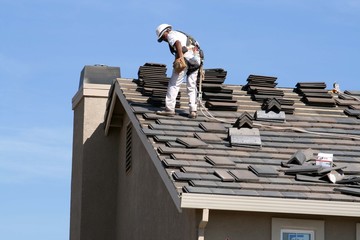
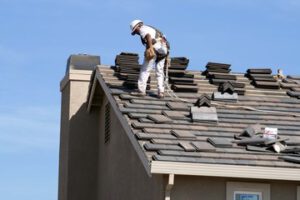
Shingles protect the roof surface, preventing rain and snow from penetrating the structure. When one or more shingles are missing or damaged, it is important to repair them quickly to avoid further damage to the roof. A simple shingle repair can keep moisture and water from causing more serious problems and save you money on expensive repairs to other areas of the house.

Roof shingle repairs are usually done with roofing cement. This is a thick, waterproof sealant that can be applied to the area where the shingle is missing or damaged. This is especially important in the valleys of the roof where water may gather. It can also be used on the edges of the roof near the chimney or vents.

The shingle repair process begins with gathering the necessary materials. A pry bar, hammer, ladder, and utility knife are all required to complete this project. A tool belt is also a good idea to keep all the tools within easy reach. Once the tools are ready, locate the location of the shingle that needs repair and begin to loosen up the nail heads with the pry bar.

Once the nails are loosened, remove the old shingle by pulling it free. It is important not to rip the shingle, as this can cause further damage to the roof and lead to leaks. If a shingle is completely missing, replace it with a new one of the same style and color.

When replacing a damaged shingle, make sure that the front edge is aligned with shingles on either side and that the back edge is covered by a shingle in the row above it. To help prevent leaking, it is recommended that you use adhesive strips along the bottom edge of the new shingle.

It is also a good idea to re-nail the shingle with galvanized roofing nails, hammering against a pry bar placed on the nailheads and under the shingle above (hitting the pry bar with the hammer rather than the shingle). Once the nails are in place, spread a bead of roofing cement over the shingle to help seal it in place.

Flashing

Flashing is the protective metal sleeve installed around protrusions on your roof like chimneys, roof windows and plumbing vent pipes. Its job is to close the gap between your roof and walls or other structures, and keep water from seeping through. Flashing is made from corrosion-resistant sheet metal that can withstand harsh weather conditions, such as dramatic temperature changes. However, if you’re not careful about regular inspections and roof maintenance, flashing can become worn down or damaged, and eventually leak.

One of the most common reasons for a roof leak is because flashing was improperly installed. Ideally, flashing should be properly fitted to ensure there’s no space between the flashing and the roof deck, and it must be tightly sealed with caulking or sealant. A roofer will replace any sections of flashing that are missing or leaking, and also seal the gaps where necessary.

There are several types of flashing to accommodate a variety of situations. Step flashing is most often used around “protrusions” into the roof, such as a chimney or dormer. This type of flashing consists of rectangles of metal bent into an L-shape, and the base of each L is nailed to the roof, while the top is secured to the vertical wall of the chimney or dormer. Continuous flashing is a less common type of flashing, and is usually employed in specialty circumstances such as a valley where two downward slopes meet. Counter flashing is also employed in certain specialized situations, such as when a chimney meets a skylight.

It’s important to know how to identify signs of flashing damage, so you can have it repaired promptly. Signs of deterioration include lifted shingles near flashing, rust or corrosion on the flashing or surrounding caulking, and any areas where the roof appears wavy. In addition, it’s important to make sure that your attic is well ventilated, so any moisture that does leak through the roof doesn’t sit and rot the inside of your home.

If you notice any of the aforementioned warning signs, get up in your attic or crawlspace and examine the flashing for yourself. Take high-resolution pictures of the entire area, and make a list of any spots that look out of place or damp. You can also have a professional roofer inspect your roof and repair any issues that you find.

Gutters

Gutters (also called eavestroughs) are essentially shallow troughs that sit perpendicular to your roof and collect water that falls onto your property. The gutters capture the water and then carry it to a downspout, where the water is directed away from your home. They are a key component in the proper drainage of your roof, and they’re a critical part of preventing the moisture that causes basement rot and mold.

Inspect your gutters for rust, sagging, and debris buildup. Clogged gutters aren’t just an eyesore; they can cause a variety of problems that affect your family’s health and the value of your house.

If your gutters are leaking, look for signs of water damage on the fascia or under the eaves. Leaking gutters are a major source of moisture in the basement, and they can also lead to foundation problems and structural damage to the roof itself.

During your inspection, you should also check the gutters for loose sections and hangers. If you find loose hangers, you can renail them using 6d galvanized roofing nails, then cover the nail heads with roof cement to prevent leaks. If your gutters are sagging, add more supports. They should be spaced about every 21/2 feet along the gutter; if your gutters don’t have enough support, they may collapse or pull away from the house.

Built-in gutters, which are often found on older homes, can be a challenge to maintain. Because they’re concealed from view, they’re easily neglected and can fall victim to a number of problems. Regular cleaning of your built-in gutters is important to keep them free from rust, leaks, and insects.

Soffit

The soffit is the board that covers the underside of your roof overhang. Along with the fascia it helps to maintain attic ventilation and prevent moisture, mold, and rot from damaging your home. It also adds a finished look to your roof overhang. A well-functioning soffit and fascia can help your house stay warm, dry, and comfortable, as well as increase its value and curb appeal.

Both the soffit and fascia are vital parts of your roof structure, but they’re often overlooked. Neglecting soffit and fascia repairs can lead to moisture damage within your attic space, as well as weaken the overall stability of your roof system over time. This is why it’s important to keep an eye out for signs of soffit or fascia damage, such as stains, discoloration, and cracking.

A properly functioning soffit helps to ventilate your attic space and keep moisture from damaging your roof, ceiling, and walls. It can also protect your rafters from the elements and insects. In addition, a soffit can help you save on your energy bills by reducing the amount of heat that escapes from your home in the summer.

Your soffit may be perforated or vented to allow air to circulate in your attic space, which can help avoid moisture and mold build-up. It can also keep the attic cooler in the summer, allowing you to lower your home’s thermostat, and can help prevent ice dams in winter.

In addition to keeping moisture and mold at bay, your soffit can also keep animals and pests from invading your home. If you see gnaw marks or other evidence of animal or pest infestation, you should call a professional for soffit and fascia repair right away.

It is easy to neglect the condition of your soffit and fascia boards because they are not readily visible. However, it is important to inspect your soffit and fascia boards regularly for damage such as rotting or flaking wood, stains, cracks, or peeling paint. This could indicate deeper problems such as wood rot, water penetration, or insect infestation that can cause additional structural damage to your home. If you notice any of these issues, contact a roofer or professional carpenter to provide soffit and fascia repairs.

post

Choosing and Maintaining a Roofing System

The roof structure of a building protects it against rain, snow, sun, and extremes of temperature. It also provides thermal insulation.Roofing

Roof inspections should be done by roof contractors on a regular basis so problems can be identified and repaired early. Regular inspection at Roofing Columbus GA is much less costly than major repairs later on.

There are a wide range of roofing materials available. The choice of material depends on the type of building, the roof covering, and often the architectural style of the house. For example, many craftsman-style homes have medium-pitched roofs and require a specific kind of roofing structure. Similarly, some regal-style homes require steeply pitched roofs.

Flat and low-slope roofs can be covered with a single membrane system like EPDM, rubber, TPO, thermo-polyolefin (PVC), metal, or high-density spray polyurethane foam. These systems are often designed to be waterproof as well as thermally efficient.

The supporting structure of a roof can be constructed with wood, steel, or concrete. Wood can be fashioned into rafters, beams, and sheathing. Steel can be fashioned into joists and planks. Typically, joists are used for spans up to 30 feet (9.1 m). Keystone-shaped joists are sometimes used for longer spans.

In vernacular architecture, roofs were often made from cut grass or sod, which provided insulating properties as well as a means of protecting the structure from rain and sunlight. Today, these kinds of roofs are often encouraged as part of the “greening” movement.

Materials

Choosing the right roof material is one of the most important decisions you will make as a homeowner. A good roofing system protects the interior of your home from moisture, heat, and cold and adds to its value. There are many different materials from which to choose, but some are better suited to certain locations or climates than others. Several factors will influence your choice, including your budget and the architectural style of your home.

The most common roofing material is shingles, which come in a wide variety of colors and styles to fit any home. Some are made from natural materials such as thatch or wood, while others are synthetic products such as fiberglass or polycarbonate. Asphalt shingles are the most popular type of shingle and usually come with a warranty of 20 to 30 years. They are a great choice for homeowners on a tight budget, as they are fairly inexpensive.

If you’re looking for a more durable and attractive roofing material, consider clay or concrete tiles. These are much heavier than shingles and therefore require more support, but they also last longer and add to the overall value of your home.

A more high-end option is slate, which has a beautiful, unique look and can last for over 100 years. It’s not as durable as other roofing materials, but it can add a lot of curb appeal to your house and is perfect for more elegant homes. Slate is very heavy, however, so it will increase the cost and time to install your roof.

Another type of roof covering is a built-up roof (BUR), which is an affordable and durable option. It’s made from multiple layers of roofing felt saturated with bitumen and applied in overlapping sheets. A layer of crushed rock granules is often added to the top to provide extra protection from UV and weather exposure.

Metal is also a highly durable and attractive roofing option that comes in a wide range of thicknesses, finishes, and colors. It can be used to clad the entire roof or just parts of it, such as the chimney flashing or areas around vents and dormers.

Installation

Whether you’re installing a new roof or re-roofing, the process is messy and labor-intensive. If you’re not experienced in handling shingles, it’s best to hire a professional. If you decide to do it yourself, make sure to wear sturdy boots and cover the plants with plastic sheeting. You’ll also need a ladder, a sturdy stepladder, and a roll-off dumpster that can be parked in front of your home for easy access.

Before beginning the shingle installation, it’s important to waterproof the valleys, which are the V-shaped areas in the middle of the roof where water runs off. A layer of felt paper is installed under the shingles, and it may need to be nailed down with close nails along the edges and spread out a bit more towards the center.

Proper attic ventilation removes moisture and heat from the attic, which helps prevent damage to the roof deck and insulation and lowers energy bills. Installing ridge vents and soffit vents is an efficient way to keep your home cool and dry. Hip and ridge caps protect the ridges of your roof, add a finished look, and help to prevent wind uplift.

Maintenance

In order to keep roofs functioning properly and avoid costly repairs, a set of procedures must be established for maintenance activities. These procedures should be based on each individual roof type and application, as well as geographic areas that experience wide variations in weather types and temperatures.

Ideally, a housekeeping survey should be conducted monthly to keep drainage devices open and identify any conditions that may require corrective action or immediate repair. This can normally be accomplished with in-house building mechanics if they are equipped with the proper tools and trained to recognize the conditions being surveyed.

During a housekeeping survey, it is important to remove any debris that has accumulated on the roof surface. Debris accumulation restricts drainage and accelerates membrane deterioration. In addition, it can pose a potential tripping hazard to building personnel.

Other items that should be surveyed regularly include:

* Ice and snow: During the colder months, the removal of snow and ice from drains, scuppers, gutters, and roof surfaces is essential. Extreme caution should be taken when using scrapers and shovels so as not to damage the membrane. The use of de-icing salt should be closely monitored as it can accelerate metal drain line corrosion and cause membrane deterioration.

Traffic Patterns: Continuous foot traffic over a roof surface can accelerate deterioration and erosion. In some cases, this can result in permanent damage. Precautions such as walkway systems or additional surfacing can be installed to protect the membrane.

Inspecting the chimney and flashing is also a good practice. Damage to these components can allow water to penetrate the roof, resulting in expensive interior damage and premature deterioration of the roofing system.

post

How to Make Dock Installation Easier

Installing a dock can be a challenging job. Some types of docks are designed to be easy to install, while others are made to be more complex. Consider a modular dock if you want to save money on the project. These are designed to be easy to assemble without the use of heavy lifting equipment or augers. The modular design also makes dock maintenance much easier.

Dock BuildingHiring a professional is the best option if you want to build a boat dock. Professional dock builders are well-versed in shoreline management techniques and the most recent materials. They are also well-versed in various dock designs. Beautiful designs can be found online, but you must gain experience building docks to choose the right one for your property. Hiring a professional at https://dockbuildingcharleston.com/ is an excellent way to ensure the longevity of your dock.

The first step of dock installation is to prepare the dock area. It should be level. Ensure the upright posts stick out about two to three inches from the bottom plate. This will make the dock more stable. Then, loosen the cross-arm clamps and slide the post into place. You can then tighten the cross-arm clamps once the dock is in place. Docks are usually sold as kits. To assemble a basic dock, you’ll need to purchase the following components: bottom plates, crossarms, upright posts, stringer brackets, caps, and crossarm clamps. To install the dock, follow the instructions provided by the manufacturer.

Choosing the right dock is an important decision. It’s also best to wait until spring before starting the process. While this may mean longer installation times, the warmer weather will make the installation process much easier. If you’re looking for a durable dock, consider choosing one made of high-density polyethylene pipe. These types of docks will stand up to the winter’s harsh weather. Then, be sure to choose a professional with dock installation experience.

Before beginning a dock installation, you should measure your waterfront. This is vital because different types of shorelines have different requirements. The depth of the water level are two important factors that will affect how your dock is placed. To ensure a successful installation, you should measure each board and mark the locations of the screws and nails. It would be best if you also planned for future growth. By making a plan ahead of time, you’ll be able to avoid many headaches and mistakes.

Depending on the type of dock, you can choose from different types of anchors to secure it properly. Some docks are built with fixed anchors, while a heavy suspension supports others. A suspension dock is ideal for choppy water, but isn’t suited for very deep water. Because of the engineering challenges, suspension docks are less common than other types of docks. They’re also a bit more expensive than other types and require more planning time.

A floating dock cannot be placed in shallow water near the shore, so it should be placed farther out. The dock should have a clear transition from the land to the water. In addition, the floating dock should be placed at a specific point on the property. It should be designed to be suitable for a wide variety of users. Materials used in dock construction can be wooden, aluminum, or steel. These materials are strong and durable, but they can cause environmental issues. Choose a material that is resistant to corrosion. It would be best if you also considered the longevity of the dock before choosing a material. Aluminum, for example, can last for decades and is more environmentally friendly than concrete.

The cost of a floating dock depends on its size, material, and location. Typically, the cost ranges from a few hundred to a few thousand dollars. However, some floating docks require docking permits or approvals, depending on the water’s characteristics. A floating dock should be connected to a fixed dock by a ramp to prevent water from reaching the dock.

For inland lakes, three to four feet of water is sufficient. Deeper waters make dock installation more difficult, so use an excavator to make the process easier. If the water is soft, you might need a pile dock. If the water is too deep, the legs will sink. Adding a flat aluminum plate to the ends of the pipes will provide support and prevent the legs from sinking.

 You can also use strategically placed chains to help with the lowering.